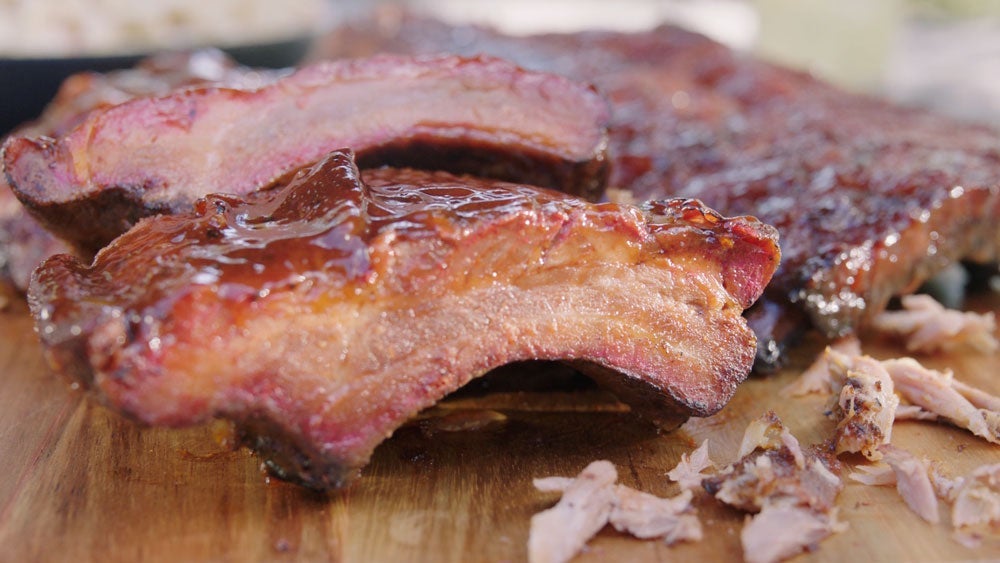
Our renowned 3-2-1 ribs recipe will make your rib game the talk of the neighborhood. This incredibly straightforward recipe eliminates all the complexity of making ribs without sacrificing flavor by smoking your ribs for three hours, cooking them in foil for two hours, and then removing them from the foil and brushing on sauce for up to an hour.
How To Cook Ribs on a Pellet Smoker
How to Cook Pork Ribs on a Pellet Grill 🔗
0
Prep: 30min
Ingredients:
- 2 slabs ribs (spare or baby back)
- 2 tbsp. dry rub
- glaze or sauce (optional)
Instruction:
- Whether you’re shopping at an old-school butcher shop or at the supermarket, there are typically three types of ribs: St. Louis-style, Baby Back and Spareribs. St. Louis-style ribs are a powerhouse of flavor bundled up in a neat package. St. Louis-style ribs are often rectangular because bits of connected cartilage, or rib-tips, have been removed. The bones are also less curved than baby back ribs. The meat is well marbled between the bones, perfect for smoking on a pellet grill. Spareribs are the meatiest of the three offerings. The Sparerib was previously attached to the pork belly and, compared to other ribs, it brings a lot of meat along for the party. It can be slightly more chewy than other rib cuts but the extra meat more than makes up for it. Baby back ribs are a fortress that protect the tender and flavorful pork loin. The bone is shorter and more curved than other rib cuts. But don’t let that discourage you from smoking them. Baby back ribs are packed with meat both between and on top of the bones, making them a formidable offering when competing for the attention of your taste buds. When selecting ribs, you want to take a few things into consideration. Unlike beef, freshness counts when purchasing pork. Select a rib with the fresh date being as far in the future as possible. Although there is nothing wrong with frozen ribs, a fresh rib will provide a bit more of a vibrant meat flavor so go with fresh ribs whenever possible. Supermarket pork ribs are commonly sealed in a Cryovac packaging. This will extend their freshness from a few days to a few weeks. But because of this packaging, the closer you get to the fresh date, the more susceptible the meat is to being past its prime. Cryovac packaging is quite thick. It can be partially translucent and hard to see thru. Because of this, you should be sure to pick up the ribs and give them a squeeze. Don’t worry, you won’t break them. But if you do find a bone that’s broken, it’s probably a good indication you should choose another rack. Pinch above and below the ribs as well as in between the bones to get a preview of how much edible meat you’re actually buying versus discardable bone. You should also look for ribs without any bones or shiners protruding out of the side. The tightly sealed packaging often makes it hard to inspect them, but a little bit of poking and prodding is well worth the effort. When you’re ready to get the ribs on the smoker, remove them from any packaging and give them a long rinse under cold water. At some point, the butcher will have cut the ribs with a saw that can leave behind tiny bone fragments. While you’re rinsing the ribs, run your fingers all over the meat, but pay special attention to any cut ends and wash away any of those undesirable fragments.
- Removing the membrane may seem like a daunting task at first. But it’s actually quite simple and only takes a few seconds to do. Start by patting the ribs completely dry on both sides with a clean kitchen towel or a stack of paper towels. On a clean work surface, flip the ribs over so the meat side is down. When you look closely at the bones, you will see the thin membrane covering most of them. I find that starting the membrane removal around the third largest rib is easiest. Use a finger and begin loosening the membrane between the bone and the meat. If you have trouble getting under the membrane, a dull knife like a butter knife works well to help break the seal. If you can pull the membrane completely away from that one bone, chances are you can remove the whole thing in a single try. Use a paper towel to grab the membrane and remove it from the rack in a single pull. It will have some tug but should remove like a large bandage that’s done its job.
- It’s important when you’re seasoning the pork ribs to evenly coat both sides with your favorite rub or spice blend. Seasoning over a cutting board or serving tray that’s larger than your rack of ribs serves two purposes. It allows you to have a vessel to transport the ribs to the pellet smoker, and it saves cleanup time catching some of the seasoning that may not have adhered. A large sheet of parchment paper also works well for transporting and keeping your workstation clean. Start by seasoning the bone side of the ribs first. To get an even coat on your ribs, sprinkle the seasoning from 12–18” above the bones. Be sure to cover the bones as evenly as possible, and don’t forget to get the ends or cut sides of the rib rack. Flip the ribs over and repeat for the top of the rack. Be more generous with your seasoning on the top of the ribs as there is more meat on the top to season. Choosing a seasoning or rub for your ribs is a matter of personal preference. Look for seasonings that have a low salt content and preferably no sugar. The pork will be getting a significant portion of its flavor from the pellet smoke, and the seasoning enhances some of the nuances of the meat. Your pork ribs are now ready for the pellet grill. You can season the ribs up to 24 hours ahead of time. Keep them covered in the refrigerator until it’s time to fire up the smoker.
- The first part of the cooking process is when the majority of the smoke will flavor your ribs. Fire up your pellet grill and set the temperature to 225°F. The best pellets for smoking pork ribs are fruit woods. Kingsford’s Cherrywood pellets do an excellent job. The Kingsford® Grillmaster's blend or Southwest blend also contains fruit wood and works well for this dish. When your pellet grill is preheated and stabilized, place the ribs in the most central spot of the cooker. The raw ribs will have some stretch to them. Once they are situated on the grill’s grate, push the bones slightly together like you’re squeezing the air out of an accordion. This minor adjustment makes the meat stand a little taller between the bones and easier to get a clean slice when it’s time to serve. Shut the lid of your pellet grill and smoke for three hours. Some people prefer to spritz, mop or baste the ribs during the cooking process. Although it has little impact on the final taste, spritzing the ribs every 45 minutes is a good excuse to check on them and make sure your pellet grill is operating properly. An apple juice spray or spritz is by far the most popular.
- Step two of the cooking process involves briefly removing them from the grill and wrapping the ribs to make them more tender. Lay two overlapping sheets of heavy-duty aluminum foil down on a flat surface and place the ribs bone side up. Fold the foil across the side of the ribs overlapping in the middle and repeat with the ends to form a pouch. Make sure the pouch is as tight as you can make it without the ribs poking through or tearing the foil. Competition barbecue cooks will often fortify the pouch with pats of butter or margarine and a few tablespoons of brown sugar. Although adding ingredients to your pouch is unnecessary, consider experimenting with different add-ins to dial in a flavor profile to your liking. Adjust the temperature on your pellet grill to 250°F and place the ribs back in the center of the cooker. Cook for two more hours in the foil pouch.
- Carefully remove the rib pouch from your pellet grill and place them bone side up on a cutting board. While cooking in the foil pouch, the ribs have become quite tender. And hot. So be careful when handling them. A sturdy set of tongs paired with an oversized spatula make handling the hot and delicate ribs much easier. You will notice that the meat has shrunk and the end of the bones are now visible on most or all of the ribs. This is a sure sign that the meat has become tender and likely delicious. To sauce, start by brushing a thick coat of barbecue sauce on the bottom or bone side of the ribs. Flip them over and repeat on the top side of the ribs. Carefully place the ribs back on the smoker and allow the sauce to set up or adhere to the ribs for up to one hour. Check the ribs frequently to make sure the barbecue sauce does not burn. Feel free to add additional coats of sauce. Remove the ribs when the sauce had firmed up to your liking and the pork has reached an internal temperature of at least 145°F. If you do not prefer barbecue sauce on your ribs, repeat the above steps without saucing.
- Place the ribs on a cutting board meat side down. Use a very sharp knife to slice between the bones. The meat will be quite tender, and a dull knife can tear the ribs. You can serve the ribs and enjoy them immediately.
FAQ
How long do you cook pork ribs on a pellet grill?
Spray the ribs once more, then brush the meaty portion of each rack with 1/4 cup of the sauce. Close the grill and cook for another 15 minutes so the sauce can set. They should be beginning to take on a red color from the smoke.
How long does it take to smoke ribs at 225 degrees?
Remove the ribs from the racks and tightly wrap them in aluminum foil. Before sealing the aluminum foil packet, add a little apple juice, wine, beer, or any other favorite flavor (about 1/8 of a cup) to improve the steam process. Smoke your ribs directly on the racks for 3 hours at 225°F.
How do you keep ribs moist on pellet grill?
Adding Moisture to the Cooking Chamber While Smoking Ribs A simple rib spritz is equal parts apple cider vinegar and apple juice or water, so for one cup of apple juice you add one cup of apple cider vinegar. The added moisture to the cooking chamber really helps with color on the smoked ribs and keeps the texture moist.
What is the 3 2 1 rule for smoking ribs?
In essence, making 3 2 1 ribs involves smoking the ribs for 3 hours on the pellet grill, wrapping them in foil for 2 hours while they continue to cook on the grill, and then cooking them for 1 hour while unwrapped and doused in barbecue sauce.